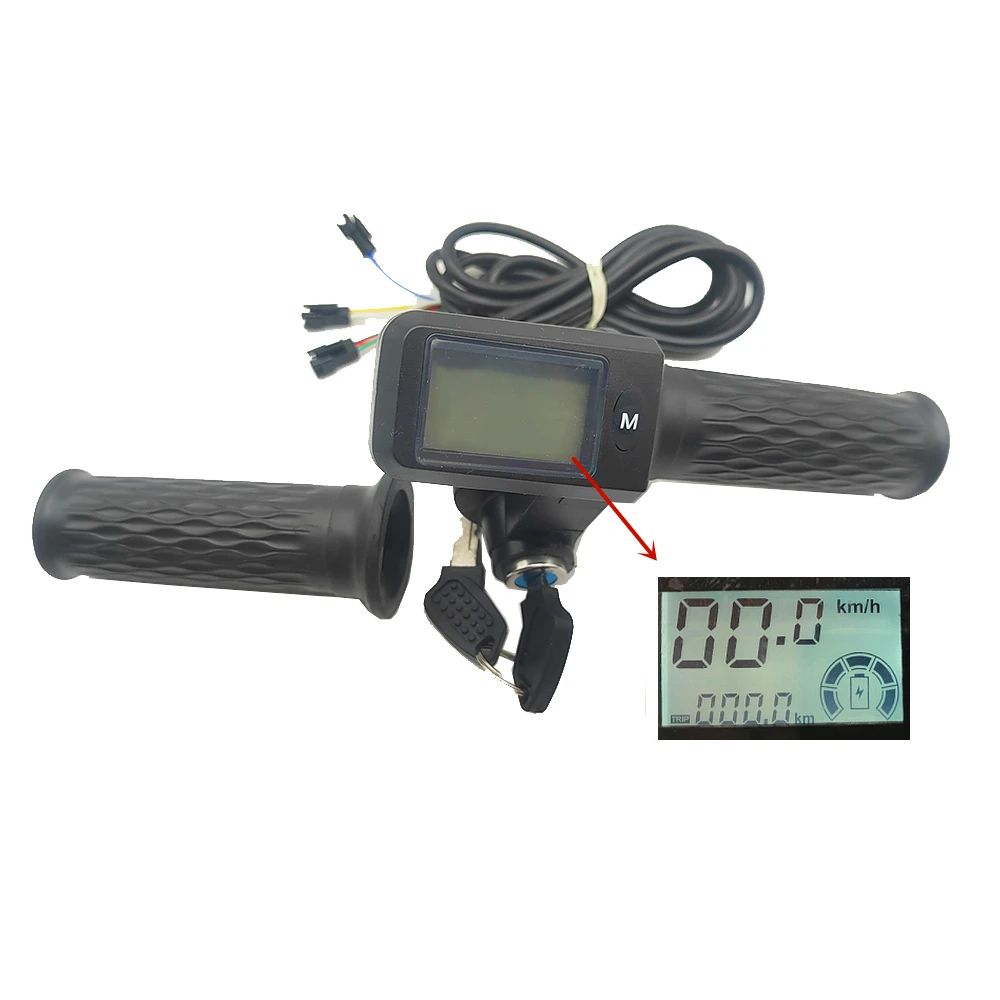
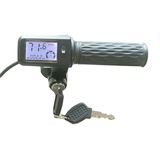
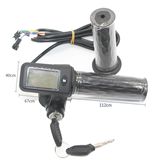
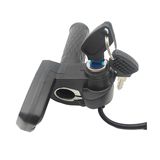
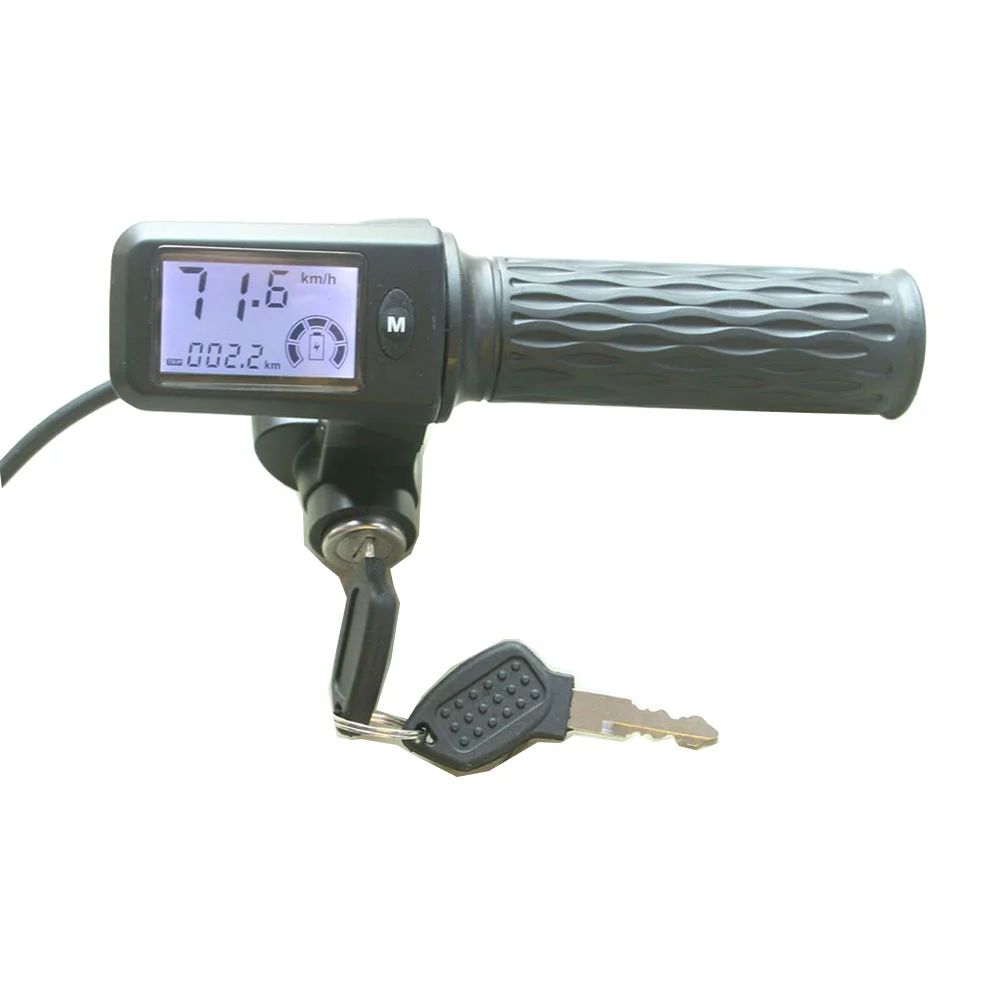
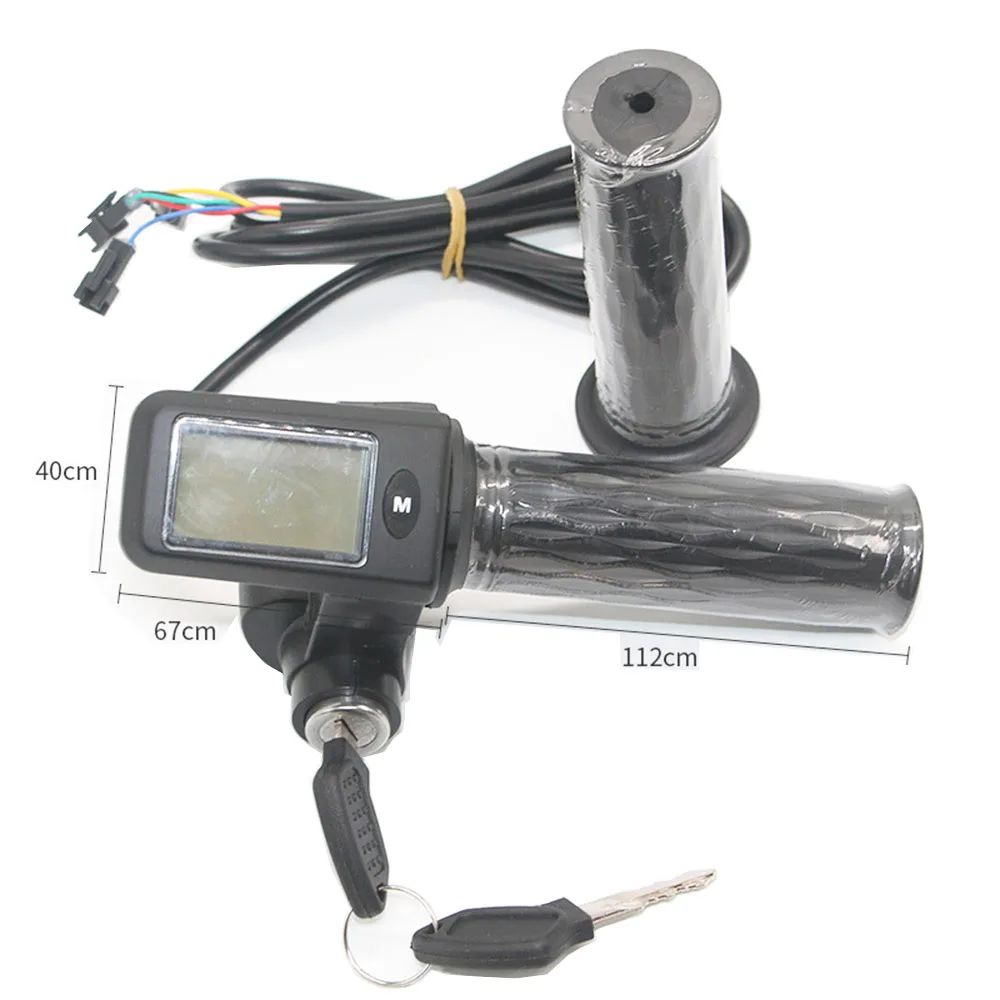
24V 36V 48V 60V 72V Electric Bike Scooter Throttle LCD Displ

Вес товара: ~0.7 кг. Указан усредненный вес, который может отличаться от фактического. Не включен в цену, оплачивается при получении.
Описание товара


| Цвет: | 24V-72V throttle |
Примечание: Accelera помечен как 48 В, а по умолчанию также 48 В.
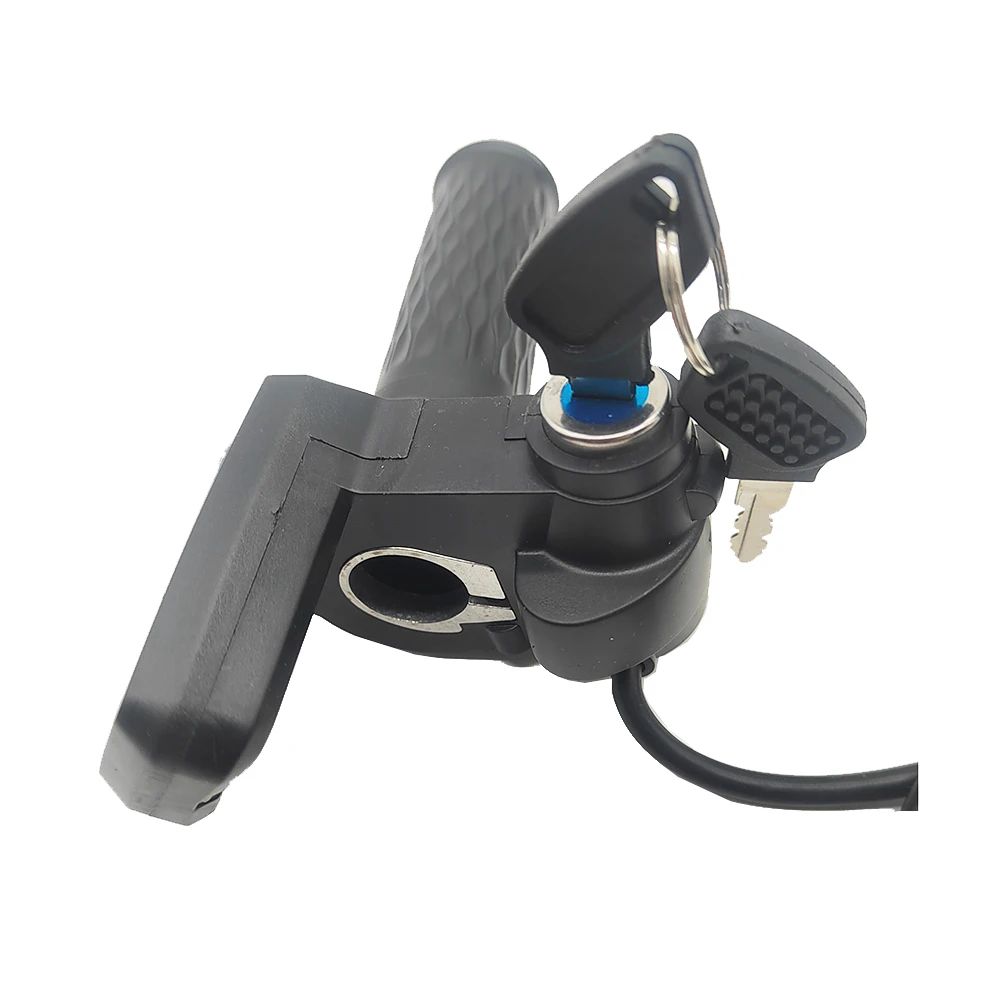
This is a throttle that can display speed and mileage,
suitable for most brushless controllers and has a wide range of applications.
The voltage is 24V 36V 48V 60V 72V Universal, which can be set according to the buyer's needs.
(First press and hold the M-key, then turn the key to start the machine,
then long press and hold the M-key until the voltage parameter flashes,
then short press and hold the M-key to switch the voltage until the desired voltage is reached,
then long press and hold the M-key until P02 flashes, then shut down and save the parameter settings.)
The throttle line 150cm, hole diameter 22mm.
24V 36V 48V 60V 72V Electric Bike Scooter Throttle LCD Display ShowSpeed and Mileage and Battery Power
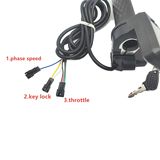
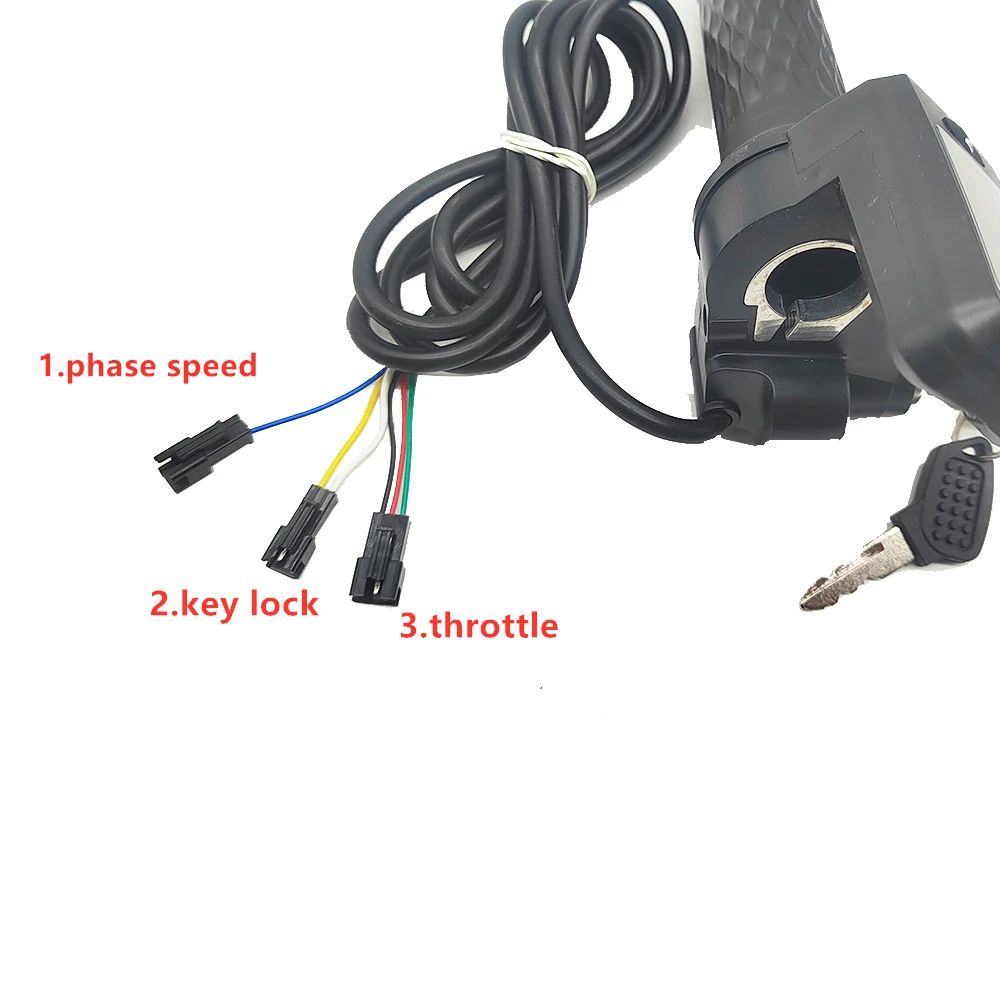
1. Скорость фазы (или указатель указателя именного вызова, P04 может установить режим Speyurement,
где 0001 подавляет тестирование скорости фазы и 0002 подавляет тестирование скорости в зале)
2. КОЛОВА
If the key is turned off and the LCD page is not turned off,
Это указывает на то, что проводка блокировки ключа обратной и необходимо заменять перед написанием).
3.throttle
(Если подключиться к дроссельной заслонке контроллера, не работает, то есть дроссельная заслонка не подключается правильно,
normal need red to red,green to green connect,black to black connect,
Но другой контроллер, дроссельная заслонка имеет другой цвет, покупатель должен отлаживать их)
how to connect this throttle?
1. Скорость фазового напряжения подключается к счетчику указателя контроллера или скоростью фазового напряжения,
2. Замок клавиша подключена к блокировке ключа контроллера
3.throttle is connect to controller throttle wires,need color to color connect
Если интерфейс дроссельной заслонки не совпадает с интерфейсом контроллера, необходимо отключить интерфейс для подключения. Это необходимо для покупателя DIY.
Если интерфейс проводов не соответствует интерфейсу контроллера, необходимо отключить интерфейс для подключения. Это необходимо для покупателя DIY.

 Guidelines for setting LCD instrument parameters:
Press and hold the M key to turn on the power and enter the parameter setting mode:
"Short press the M key to quickly switch to the upper row of P characters,
first displaying P01 in descending order; * Long press the M key for more than 3 seconds,
the lower row of numbers will flash, and then short press the M key to change the parameters,
Hold for 5 seconds to save the current parameters.
Code:
P01 can be set to 24V, 36V, 48V.60V, 72V voltage, with a default value of 48V
P02 can be set from 10 to 150, with a default of 100
P03 can be set to 90-130, with a default of 100
P04 can set the speed measurement mode, where 0001 represents phase speed testing and 0002 represents hall speed testing
P05 can set wheel diameters of 8,10,12,14,16,18,20,22,24,26,28,29, with a default of 14 inches
P06 can set the number of magnetic steel from 1 to 99, with a default of 30
P07 can set the battery voltage display coefficient to 95-105, with a default value of 100
P08 can be set with three gear functions: P08=0 without gear, P08=1 defaults to first gear, P08=2 defaults to second gear, and P08=3 defaults to third gear Default is 0
P09 mileage reset: After entering the parameters, long press for 3 seconds, the mileage flashes, and short press 10 times
Switch between P10 kilometers and miles, with 0001 representing kilometers and 0002 representing miles


 DC Motor Electric Bike/Bicycle E-Scooter Brushless Controller 36V 48V 60V 64V 1000WCNY 84.00/piece
 Electric Bike Scooter Motor Brushless Controller with LCD Display Control Panel 36V 48V 60V 26A-33A Compatible with S866 TF100CNY 63.00-193.20/piece
 36V 48V 60V 450W 500W 650W Electric Bicycle Scooter Controller with LCD Display Throttle Brushless Controller fit TF100 S866CNY 63.00-179.20/piece
 Ebike Controller Scooter Motorcycle Electric DC Motor Brushless 1500W 2000W 2500W 48V 60V 64V 72V Spare Parts Bicycle AccessorieCNY 131.60/piece
 36 В 48 В 60 В 72 В 500 Вт-1000 Вт Универсальный 3-рекордский синусоидальный контроллер 12 Трубка подходит для электронного двигателя электронного байка с электрическим скутеромCNY 101.50/piece
 Electric Controller 2500 3000W 48V 60V 64V 72V 45A 50A 60A Brushless Dual-mode For E-Bike Motor Motorcycles Spare AccessoriesCNY 168.00/piece
 36V 48V 1000W Electric Scooter Motor Brushless Speed Controller For E-Scooter E-Bicycle E-BikeCNY 112.70/set
 36V 48V 60V 1200W 1500W 2000W Electric Bike Scooter Controller with LCD Display Thumb Throttle Fit TF100 S866 TF200CNY 63.00-209.30/piece


